 Updated: November 2017
It’s time for the AntiLaser Priority review. 🙂 While radar detectors are great against helping you avoid speeding tickets from police radar, they’re virtually useless against police laser. Radar detectors also have laser detectors built in, but against laser they’re little more than ticket notifiers. As soon as they go off, your speed has been acquired and you won’t get any warning ahead of time. Additionally, because a laser beam is so small, there’s a good chance that your radar detector may not even go off at all if an officer is shooting your license plate or headlights and your radar detector is up on your windshield. If a police officer is using laser (and laser is used all over the country), you need to pair a laser jammer with your radar detector.
A laser jammer is designed to fire back at a police laser gun, jamming it, and preventing it from displaying a speed. When your jammers go off, you slow down to the speed limit, quickly turn off your jammers, and allow them to get a reading off your car doing the speed limit. They have no idea that anything weird happened, they see you doing the speed limit, and they shoot the next car in line. Simple.
There’s several laser jammers on the market from a variety of companies. Everyone wants to say that they’re the best, they can jam all the lidar guns out there, and so on… but which one really is the best?
AntiLaser Priority Review
If you want the quick answer, the best jammer on the market is the AntiLaser Priority. They’re the ones that countermeasure enthusiasts are all buying and they are the most effective jammers when it comes to jamming all the different lidar guns on the market, including the latest guns with sophisticated anti-jamming technology. Additionally, unlike many other companies which provide very limited support in terms of updates over time after they sell you a jammer, AntiLaser is very good about staying on top of things and issuing updates to make sure that your jammers stay current and able to jam all the known guns out there which is critical. They spend tens of thousands of dollars every year buying new laser guns so that if something changes in terms of laser guns, you’ll quickly get an update for your jammers to keep you ahead of the curve. Laser jammers are something that need to be updated periodically as things change and so long term updates are very important.
 Compared to the previous generation laser jammers out there, the ALP is also more sensitive at detecting lidar than other jammers which means that they’re better at protecting your entire vehicle, the increased sensitivity means you’re less likely to have a weak spot on your vehicle far from the jammer that a gun can get a reading off of, you have more options in terms of placement of the jammer heads on your car while still maintaining solid protection, plus they’re more forgiving of less than perfect installs or heads moving over time which can lead to punchthroughs (a lidar gun getting a reading off your car while your jammers are trying to jam it). Because the ALP’s can run up to 6 heads instead of 4 (up to 3 per side of the vehicle), it means that if you need more than 4 heads (common for larger vehicles), you can simply add an additional head rather than having to buy another system entirely which is more expensive and leads to more unnecessary duplicate hardware in your vehicle, dual kill switches, and so on. Being able to plug additional heads into a single ALP brain is great.
The ALP also has a bunch of accessories available that helps add a lot of useful functionality. For example, you can integrate it with a variety of different radar detectors to have just one setup for both radar and laser, you can get voice alerts with the HiFi module, you can pair it with your phone over bluetooth if you don’t want the control pad installed in your cabin, and so on. If you want a fully integrated radar/laser setup, there’s now also the Net Radar available which is a very good radar detector so you can have a complete radar and laser system for your car that’s good in both departments.
These are the jammers that just about everyone in the enthusiast community is now running, myself included. When it comes to laser jammers, there isn’t really the same level of competition that there is with radar detectors.
Find out how the AntiLaser Priority compares to the best laser jammers of 2016.
Find out how the AntiLaser Priority compares to the best laser jammers.
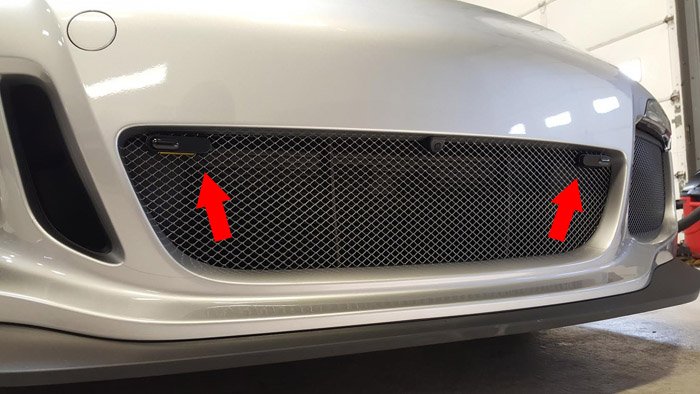
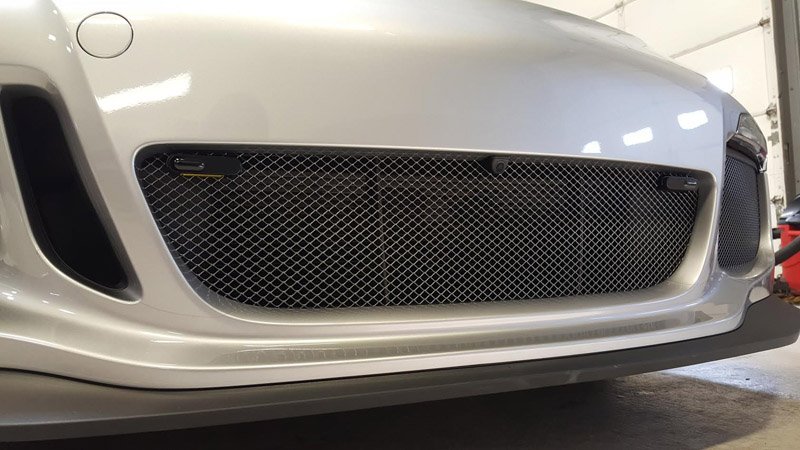
ALP duals installed on a 911, image courtesy of BRD & JK Automotive Designs
What About The Other Laser Jammers?
The previous top jammers were the Blinder HP-905 Compact and the Laser Interceptor.
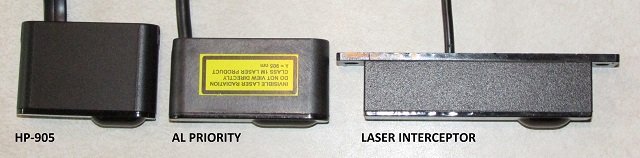
The LI’s were the previous top jammers on the market and they were the best for many years. They were the jammers to get. After some time, the heads started showing their age, especially as new anti-jamming lidar guns like the DragonEye started coming onto the market and the LI’s weren’t able to respond accordingly due to them using older hardware. That was around when AntiLaser stepped in with their far more sophisticated hardware with the ability to jam these new guns while LI basically threw in the towel. The US distributor is now no longer even involved with LI’s and is now involved with Stinger. Stinger makes what is currently the second best jammer and I’ll talk about them in just a moment.
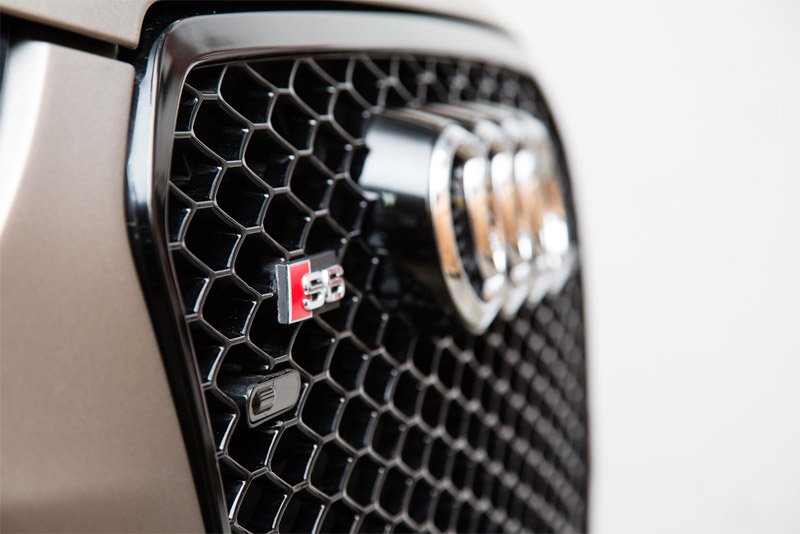
When the LI was popular there was also the Blinder HP-905. These were similar in capability to the LI’s and their main advantage was the fact that they offered smaller heads. This meant for a less visible install and also made it easier to install the jammer heads in grills where the LI’s were too large to fit. This was the reason I went for HP-905’s over LI’s and they saved me every time I needed them. I’m glad to have run them. The main drawback is that Blinder’s history of updates is pretty lousy and they would claim to be able to jam certain lidar guns like the Poliscan when in reality they couldn’t. They’re just not very good at keeping their jammers updated over time (there hasn’t been an update for several years now) and this is something that you really do need to look for when selecting a jammer. So the lack of updates along with the inability to jam some of the newest guns on the markets is what is having people move away from the Blinder units. It’s why I switched.
To save some cash, you could always get one of these other systems, especially a used one. Generally though, I wouldn’t recommend it. There’s two reasons. Number one, you often have to drill holes into your grill for the jammers and potentially your interior for the controls. That’s not something that’s easy to undo and change once you need to switch systems. Additionally, the install can be a PITA when it comes to running the wires through your firewall, mounting the heads on your car, potentially having to remove your bumper, and so on. You can do it yourself which takes a lot of time, or you can have it done professionally which takes a bunch of money. I’ve seen some people doing professional installs where the install costs more than the jammer itself! Uninstalling down the line to switch over is a pain and it’s for that reason that I’d recommend that you do it right, right from the get-go. The peace of mind of knowing you’re protected is a big part of it too.
When it comes to good jammers that would be worth installing, the only other company that’s producing laser jammers that can deal with the latest lidar guns is Stinger. The Stinger VIP radar detector is an advanced radar detector and it also offers laser jammers that are designed to pair with the radar detector (unlike the ALP’s which are designed to be standalone but also have the ability to integrate with several different detectors). The Stinger’s laser jammer heads are smaller than the ALP, about the size of a dime, and they even offer ridiculously tiny fiber heads that are only 2.6mm wide so they’re easy to conceal and almost impossible to spot.
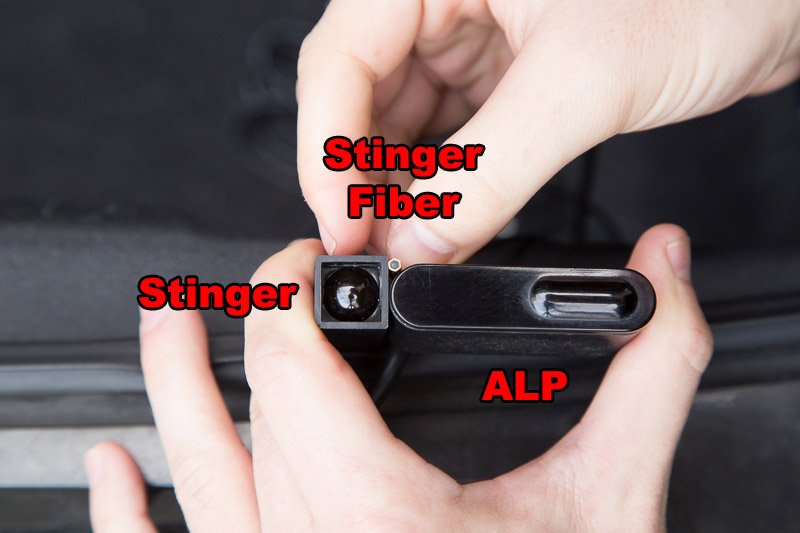
It’s more expensive for the Stinger system, but these tinier heads make for a popular choice among those who want the stealthiest install possible where the jammers don’t take away from the aesthetics of the car as much, especially with those who drive higher end or exotic cars. Stinger uses separate transmitters/receivers so while each head is smaller, you have twice as many of them. The main limitation right now with the Stinger jammers, and why they’re not the best, is that their software is still in development and their jamming capabilities are not yet totally solid. There’s users who are still reporting that they can’t completely jam lidar guns on a consistent basis, especially at closer range. The Stinger engineers have been pretty good with issuing updates which is awesome so I do expect them to be solid down the road, but they’re just not there quite yet and it’s for that reason that I’d recommend the ALP’s today by default.
As for the other jammers out there, you’ve got the Escort ZR5 and ShifterMax jammers (what they use with the Max Ci and Max Ci 360) which is a step forward from Escort’s previous ZR4’s and LSP’s, but still lags behind the ALP in terms of jamming effectiveness (most importantly) and support for more heads for larger vehicles. The K40 Defuser Optix is using last gen hardware that also doesn’t have the ability to jam the latest guns out there either.
If you’re looking to buy a jammer these days, the ALP’s are the go-to solution. The only other ones that would be worth recommending would be the Stinger VIP if you want the smallest heads possible and are also getting their radar detector. Other than that, the ALP’s are the ones to go for.
How Do They Perform?
How well do the ALP’s jam lidar? Well they’ve been tested very thoroughly by this point. At first testing was done to see if the ALP’s actually lived up to their claims of being able to jam the tough guns that other jammers couldn’t. Then as more and more people started picking them up for their own vehicles, they’ve been tested even more and we see them tested regularly in different testing events. Because they’re so good, they’re often the only jammers you’ll see at testing events.
As far as their effectiveness is concerned, they are good at jamming both the older easier guns and the newer tougher guns. Take a look at some sample test results from a lidar test meet.
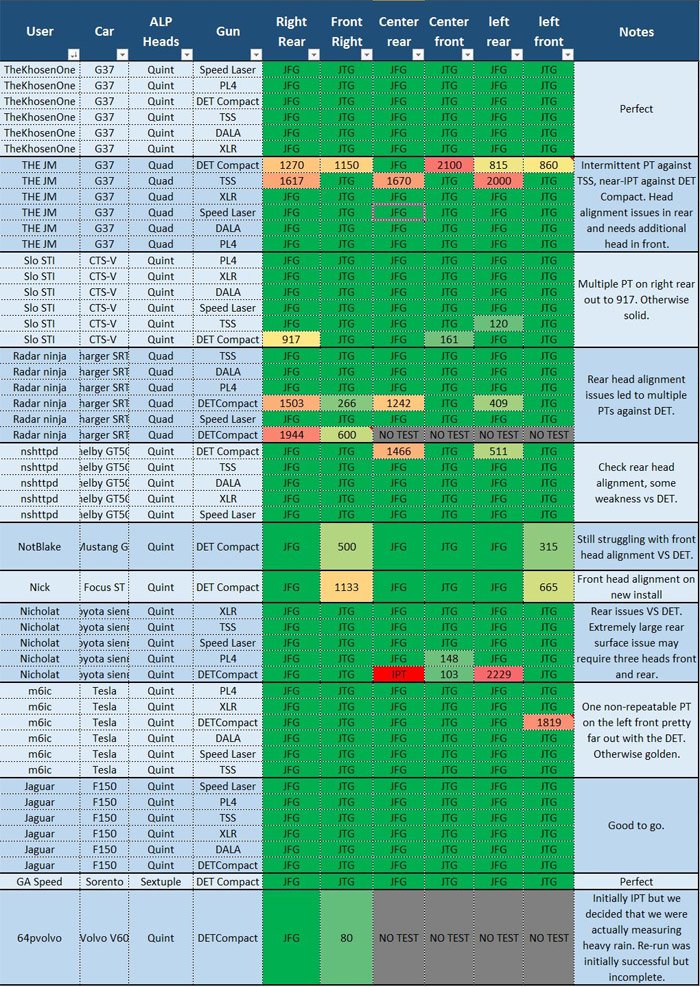
Source: https://www.rdforum.org/showthread.php?t=46533
You’ll notice that everyone is running ALP’s there, and for good reason. You’ll also see that it’s mostly green on the chart. Dark green means that the lidar gun was never able to get a reading whether they’re driving towards the gun (Jam To Gun, JTG) or driving away from the gun (Jam From Gun, JFG). This is what you want to see in testing, but you never actually want to do this in the real world. You want to slow down and let them get a reading off you at some point. See here for more info on using your jammers properly.
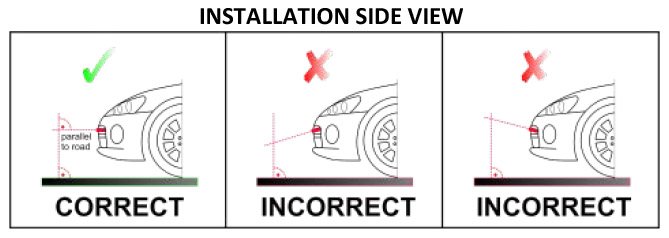
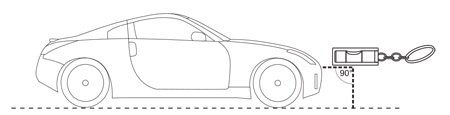
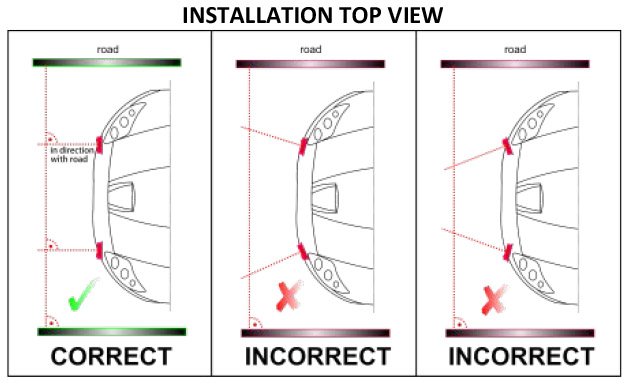
You’ll also see that some people had punchthroughs where the gun was able to get a reading. This is usually due to heads not being aligned straight. It can also be due to heads not being placed on the ideal location on their vehicle to provide full coverage. It’s for this reason that proper installation is key and testing is important. My ALP setup guide covers all of this.
In any event, as you can see, when the jammers are installed well, they perform great. In some of the cases where punchthroughs happened, they were at pretty close range meaning that even in those situations, the driver would have enough time to slow down and kill their jammers anyways so they would help the driver avoid a speeding ticket.
A Closer Look at the Jammers Themselves
So we’ve looked at the performance of the jammers which is the most important part. Let’s take a look at the jammers themselves.
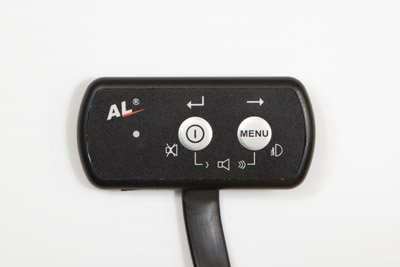
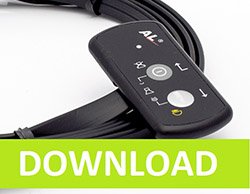
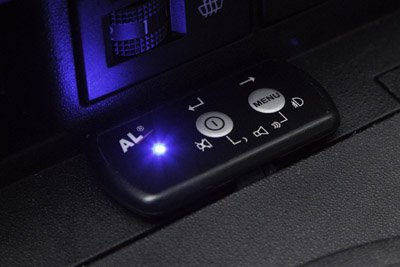
When they’re installed in your car, there’s not really much to see. You’ve got the jammers themselves which you install in the front as well as the rear if you want full protection, you have a control pad with two buttons and a little status LED, and an additional external LED you can place somewhere easy for you to see. Let me show you how it looks on my car.
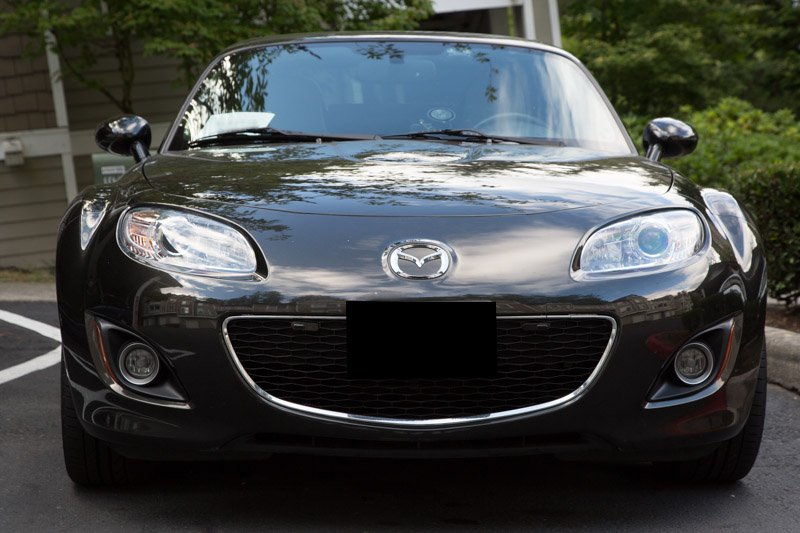
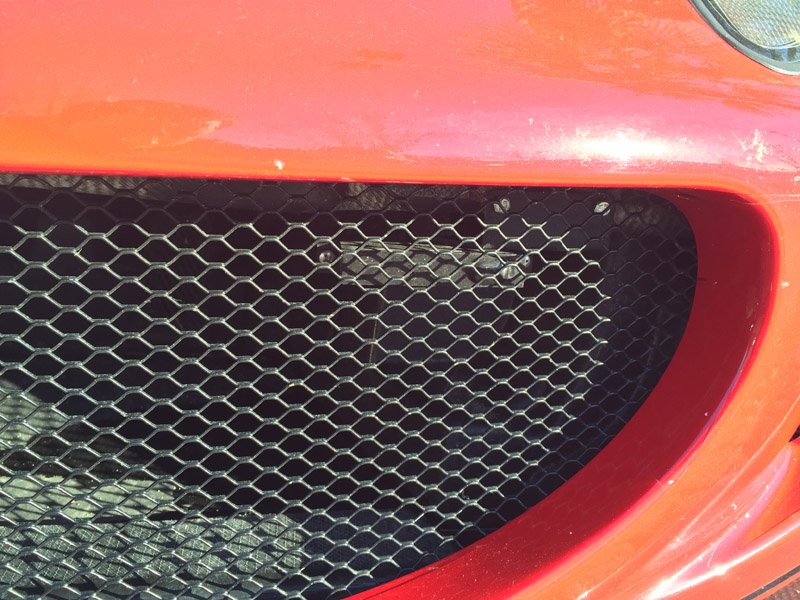
Two jammers in the upper grill of my Miata
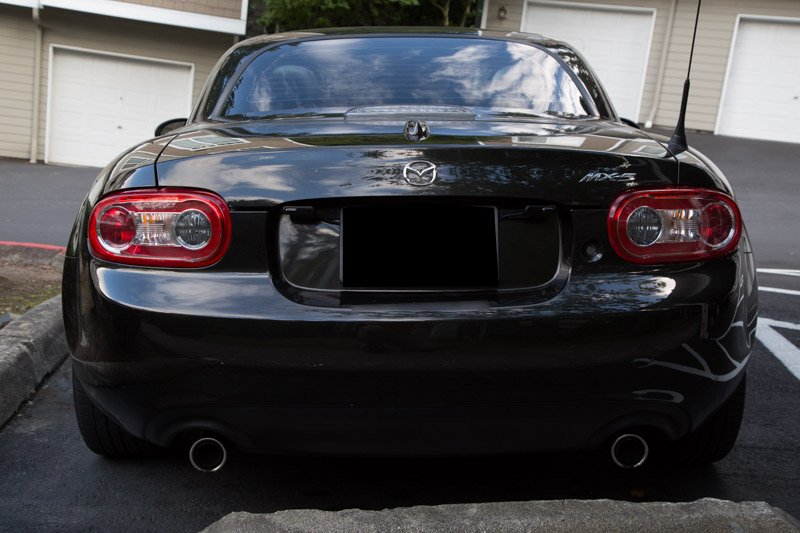
Two rear ALP heads on either side of the rear plate
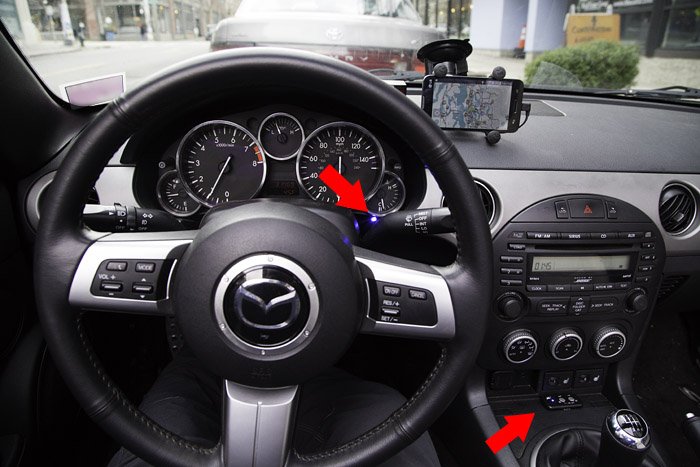
Inside my car I have my control pad placed right in front of my shifter. It makes it super easy to get my hand to it quickly without looking, find it by feel alone, and press the buttons to change settings or kill my jammers as needed. The external LED I’ve placed in my instrument cluster so I can see it lighting up without taking my eyes off the road. I’m thinking of moving it up on the dash where it meets the windshield so that my dashcam can see it too.
Overall I really like the system. I’ve had it installed in my car for a few years now. Since I bought it, it’s had a number of really nice upgrades and AntiLaser keeps adding new features, adding support for new guns, and the product keeps getting better and better.
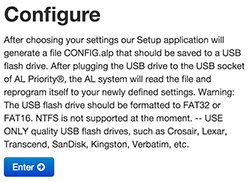
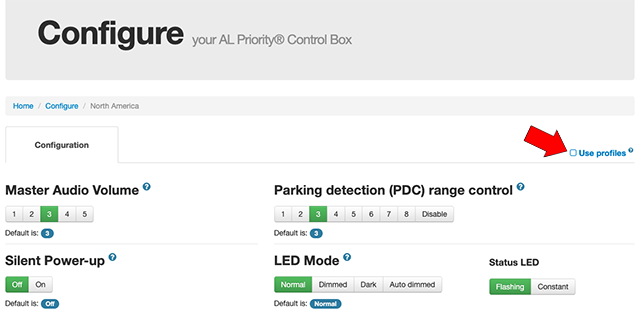
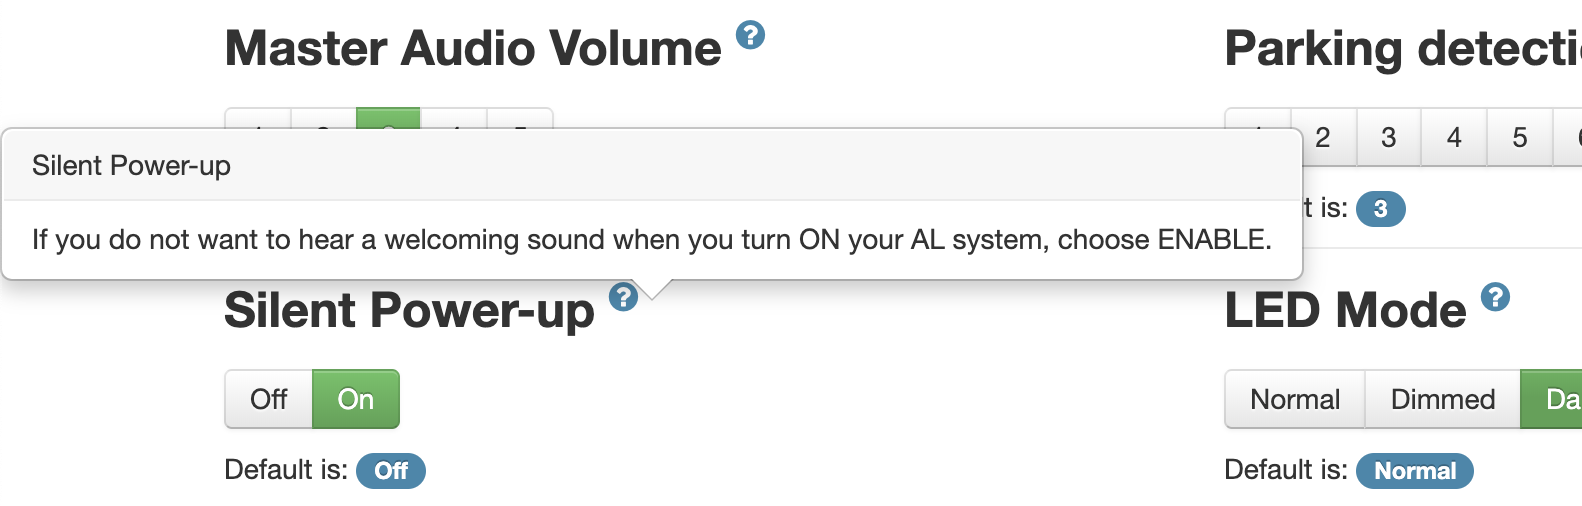
I really like that you can do all the configuration on your computer, copy your settings over to a USB drive, and plug that USB drive into your jammers. So much better than before! With previous jammers you had to take a laptop out to the car and update it there. With some you even had to have an internet connection to download updates (you couldn’t download them ahead of time) so you had to park somewhere close to where you could get WiFi. Some also used a serial port instead of USB, something many modern computers didn’t have so you’d need a USB to serial port adapter. The new method with the USB drive is so much better. If you get the Bluetooth module, you can even change settings or update the jammer’s firmware through your phone which is awesome.
There’s also some nice accessories you can pair with your ALP. I use the HiFi module which includes an external speaker which is not only louder, handy if you’re out on the highway with the windows down and the music up (it can automatically mute your stereo too if you wire it up to do so), and it also gives you voice alerts to make it much easier to navigate the menus. You’ll also get notified of what gun you get shot with when you get shot. Super handy. Some other jammers include the speaker as part of the standard equipment, but with the ALP it’s an optional extra.
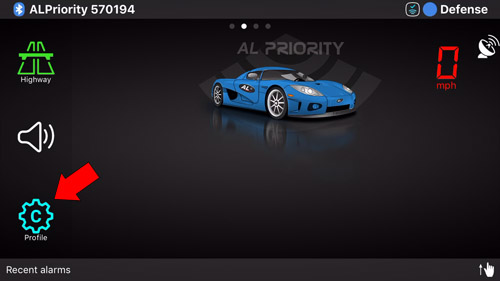
Another option is the ability to add a Bluetooth module and pair it with your phone for a visual display. Here’s a video comparing the ALP using the Bluetooth option on both iOS and Android, as well as the HiFi module.
Two updates after this video was released:
- If your phone is not connected, the jammer now falls back to the control pad so your system is always up and running. It no longer shuts off altogether if the app isn’t running.
- You can now use the BT module and control pad simultaneously to a certain extent. You can be connected via your phone and use the menu button on the right side of the control pad to JTK when you get shot so you always have a dedicated JTK button. Awesome.
Integrating the Net Radar radar detector
 If you want a fully integrated radar/laser installation, they make a radar detector specifically designed to pair with the ALP called the Net Radar. Not only do you get a cleaner looking cabin and a more OEM look with less clutter, but there’s no detector to put up or take down, nothing on the windshield to potentially get stolen, nothing visible to police officers, and so on.
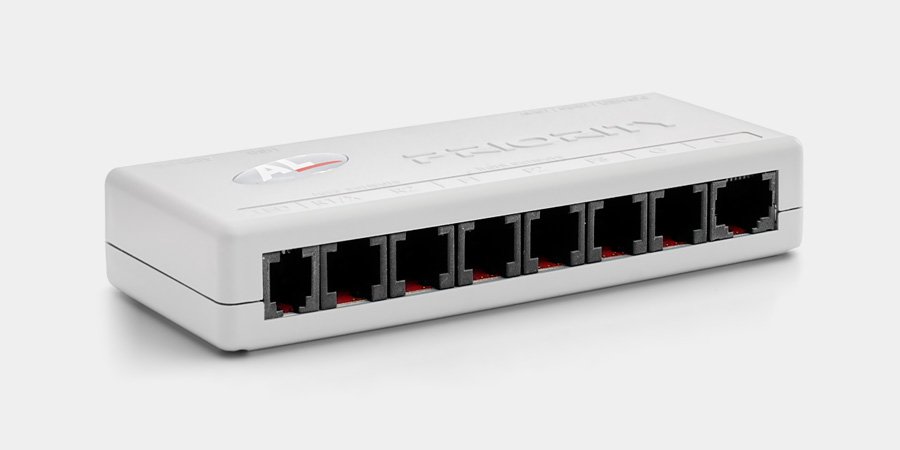
The Net Radar offers very good performance, excellent blind spot filtering, has the option of adding a second rear antenna for improved rear detection and arrows, and even a third antenna specifically for the MRCD for people in Alberta or Quebec where this new low powered radar gun is in use. It also comes with some of the additional accessories you need like the GPS antenna for low speed muting and the Radar/GPS (RG) module to plug the antenna into the ALP while the other antennas require you to purchase the accessories separately at an additional cost. If you also pick up the Bluetooth module, you’ll also be able to do manual GPS lockouts using your phone so that you can teach it where the false alerts are located and it will automatically mute them for you in the future.
You can purchase the Net Radar here.
If you like, you can watch a quick demo of both radar and laser alerts on the ALP. This setup shows you what you’d see if you pair your phone to the ALP with the Bluetooth module. The audio alerts are exactly the same if you were using the HiFi module.
Conclusion
These are the most effective jammers on the market these days. They’re the ones that people who know about laser jammers buy. They’re the ones that people who use previous generation jammers are upgrading to. If you want to know what the best jammer is, it’s the ALP. I wish recommending a radar detector was this simple. It would make my life so much easier, lol… 😀
The jammers are able to jam all the known guns on the market today, they are continually being updated as new guns are released and when there’s helpful new features and accessories to be added, their customer service is top notch, the heads are pretty small so they’re not very noticeable, and with the ALP’s you’ll be set up for both the short term and the long term as much as possible.
![]()
A Couple Quick Laser Jammer FAQ’s
A couple quick frequently asked questions for those of you looking to get these jammers now.
Q: How many heads should you get?
A: Depends on your car, where you drive, and if you want just front or both front/rear protection. See this section of my ALP setup guide.
Q: What if jammers are illegal in my state?
A: You can look here to see if they are. I understand that’s a concern for people. I don’t recommend breaking the law of course, but remember that speeding is illegal too. In fact the penalties for speeding are far worse than having jammers (higher ticket prices, insurance hikes, potential court costs, etc.). The penalty for having a jammer is typically the equivalent of a “fix it” ticket, similar to having window tint that’s too dark or missing a front plate if you need one. Additionally, if you use your jammers properly as explained here, they won’t know you have them in the first place and you’ll be able to drive away just fine after you get shot.
Q: How do I install these jammers?
A: You can do it yourself or hire a professional. It takes some time to run the cables through your car, wire everything up, power your jammers, find a suitable location for your jammers, and install the controls inside your car. Some cars are easier than others. If you want a professional to help, make sure you’re both on the same page as to how you want the install done. 🙂 See this section of my ALP setup guide for more important installation info.
Q: What happens when I get shot with laser?
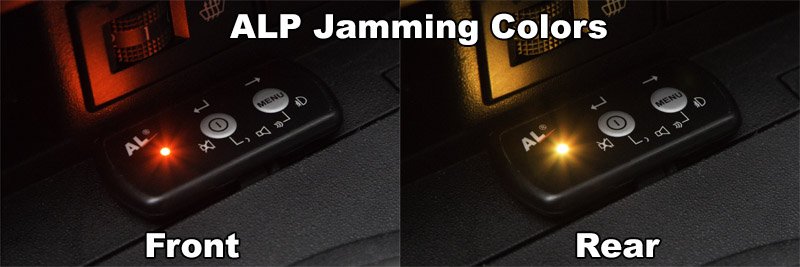
A: An alarm will go off in your car using the ALP’s speakers. The LED’s will also light up. They’ll be red when you get shot in the front. If you have the rear jammers, they’ll light up yellow. If you have the HiFi module or Bluetooth module, the jammer can also announce which gun you’re being shot with and if you’re being shot in the front or in the rear. Your goal then is to slow down to the speed limit as quickly as possible and kill your jammers, allowing the officers to get a reading off your car doing the speed limit. This process is called JTK, or jam to kill. You jam them until you kill your jammers.
You can kill your jammers manually by pressing either button on the control pad, by tapping on the phone’s screen if you’re running the app, or by letting the ALP automatically kill the jammers for you. When configuring your ALP, you can select how long it will jam for before automatically stopping jamming. You’ll want to get this process down to about 2-3 seconds. Most people set their jammers to automatically kill after 4 seconds, maybe 5 seconds max, as a backup to manually killing their jammers. When the alarm goes off, brake, and when you are down to the speed limit, kill your jammers.
Buying the AntiLaser Priority
If you’re looking to buy the ALP, make sure you buy it for your region. Prices vary in different areas, but ALP’s are region locked so they’re different if you buy them in the US, Canada, Europe, Australia, etc. They’re only designed to work against the guns in use in your region and so ALP’s are only sold from specific dealers in your region.
You can buy them from a local dealer/installer in your area if they carry them, but what I did was buy online. They start at $750 for a dual head setup. I recommend Tom who’s the main guy here in the States for the ALP, knows all about them, and would be the man to talk to when it comes to customer service, warranty support, installation, answering questions, and so on.
If you live in the USA, you’ll need to order them from Tom at ALPriorityUSA.com.
If you live in Canada, you’ll need to order them from Alex at KMPH.ca. (Save $50 with the coupon code “VortexRadar50”)
You can buy the ALP there, as many heads as you need, as well as any accessories you’ll want to pick up.
I have a comprehensive ALP setup guide designed as a followup to this AntiLaser Priority review to help you buy what you need and get your jammers installed properly so that they can work most effectively. Definitely check that out. Before you buy, check out the section of the guide going over how many heads you need as mentioned earlier, that way you know how many you’ll need.
Enjoy your jammers, get them installed properly, use them correctly, and they should treat you well for years to come.
Happy driving! 🙂
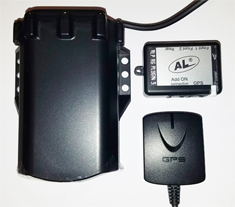
 The HiFi module adds an external speaker to your ALP to give you not only louder alerts which you can hear better over any music or road noise, but it will also announce what gun you’re being shot with, it makes it easier to navigate the menus since it tells you what menu option you’re accessing (otherwise you have to look up what different beeps and LED colors mean), and it allows you to use several different profiles at once so you can quickly switch settings on the fly.
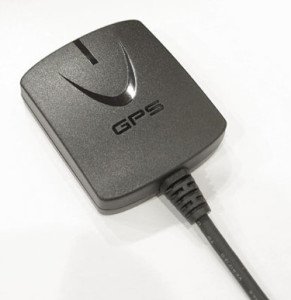 You can plug in a GPS antenna to add some speed-based functionality to your ALP. For example, you can give yourself low speed muting for radar, have your laser jammers automatically disable at low speeds, have your parking sensors disable at higher speeds, plus the GPS antenna is required for the Tx sensors. Additionally, you can have your ALP log how fast you were going when you got shot so you can see how big of a save you got and the ALP can also function as a VBOX and measure your vehicle’s 0-60 times, so there’s a bunch of useful features that the GPS antenna offers.
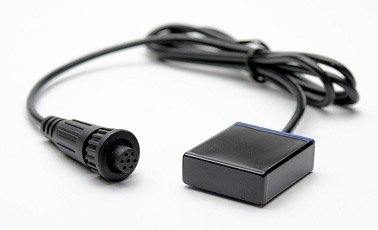
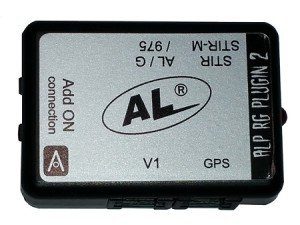 The RG module is designed to allow you to plug in your Net Radar radar detector antenna into your ALP if you’d like to add a radar detector to your laser jammer and have an integrated radar and laser setup. The old version of the RG module (RGv2) supported antennas such as the STi-R Plus, 9500ci, Radenso HD+, and V1, but that module has been discontinued and most of those radar detectors have since been discontinued too. The latest version of the RG module (RGv3) is specifically designed for Net Radar and Net Radar DSP integration and so if you want a radar detector to pair with your ALP, the latest version of the RG module you’ll see online is the one to get.
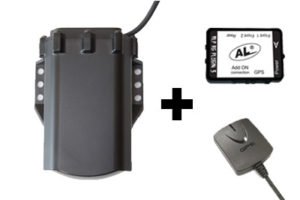
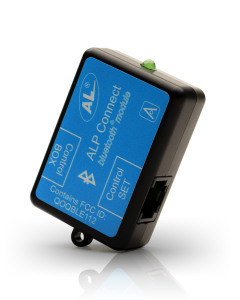 LP with your phone and it works on both Android and iOS. With your phone you can update your ALP’s firmware directly through the app rather than needing to download the update on your computer and transfer it to your ALP with a USB drive. You can also adjust your settings through the phone while sitting in the car. Like the HiFi module, you can add voice alerts, except the audio will now play through your phone’s speaker or through your car’s stereo over Bluetooth. Here’s a quick demo of how the alerts look and sound over Bluetooth:
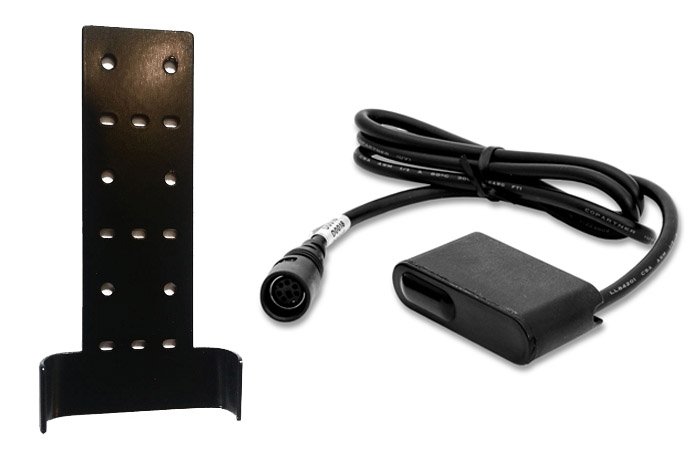
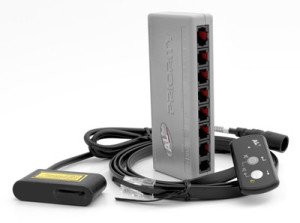
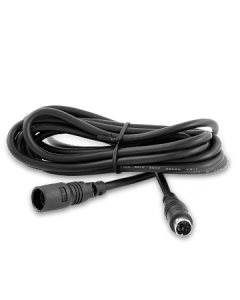 The cables that connect the ALP heads to the CPU are 5m (16.4 feet) long. This is generally enough for connecting the front heads, but for some vehicles you may need an extension cable for the rear heads, especially when you are running the wires under and around the trim of your vehicle. The extension cable will add an additional 2.5m (8.2 feet) of length. You’ll need one extension cable for each head you’re extending the length of.
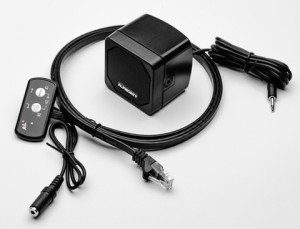
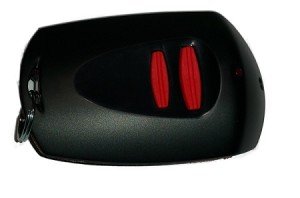 If you want to test your ALP and verify that the heads are working, having a device that can trigger your ALP is very handy. This pocket tester simulates the pulse pattern of a bunch of different lidar guns. It’s great for not only verifying that your ALP works properly, but also to troubleshoot if you suspect that one of the heads isn’t responding to lidar. The ALP does its own self-check and will let you know if a head fails at any point, but this is a great add-on as well.
 Finally, the last accessory to consider is a wireless Bluetooth button called the Flic that adds a dedicated control button to your ALP to let you do things like kill your jammers, mute or lock out your radar alerts, and power the system on and off.